

’Tis the season to be jolly! ’Tis also the season to decorate your Christmas tree and your cosy dwelling. If you are looking to do something different this time around, we suggest making your very own tissue paper fringe ornament.
The best part about it is that you do not need to make these ornaments exclusively for Christmas. You can use them anytime there is a festival knocking on your door!
What you will need:
- Tissue paper in various colours (or wrapping/crepe paper)
- Camlin Glue Stick
- Scissors
- Plain ornaments and hooks
Steps to make DIY tissue paper fringe ornaments
Step 1
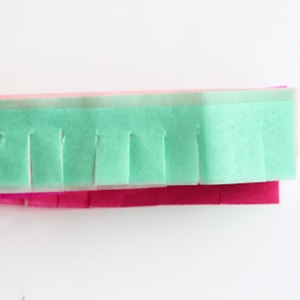
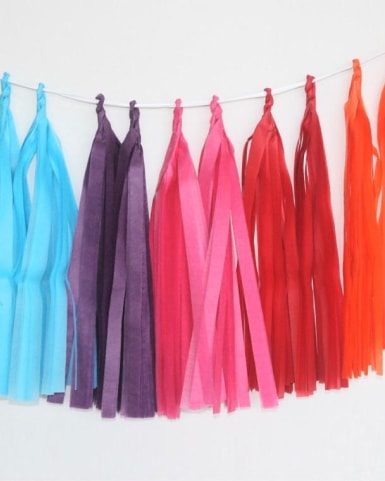
Cut ½ inch strips of tissue paper. Lay them all out in a pile. Then, cut fringes on them. Leaving ⅛ inch from the top, slit ¼ inch fringes on the edge.
Step 2
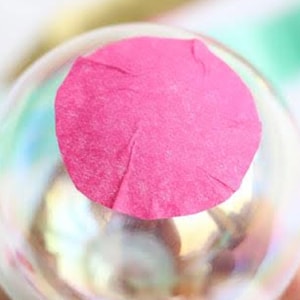
Cut out a small 1 inch diameter circle on one of your chosen papers. This will be glued to the bottom of the ornament to create a base.
Step 3
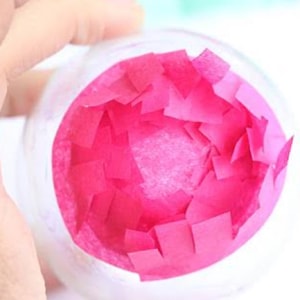
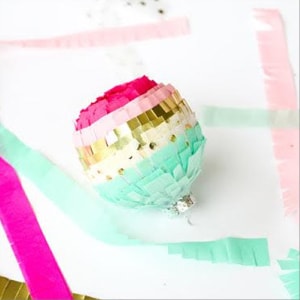
After the base is done, glue one of the fringed tissue paper strips around the ornament. Once the fringe goes all around it, cut and glue it in place. Continue this step, until the ornament looks like the image below.
Step 4
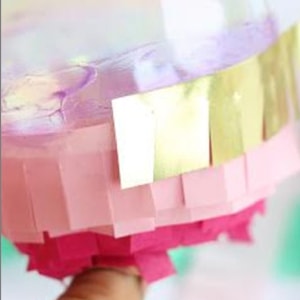
Switch to another colour of fringed tissue after going around with the ornament with one hue a few times. Use this new coloured fringed tissue to repeat step 3. After a few rounds, the ornament should start looking like the image below.
Step 5
Remove the cap and the loop, then glue the fringe to the top of the ornament. The cap and the loop can be placed back again for a nice, clean look.
Step 6
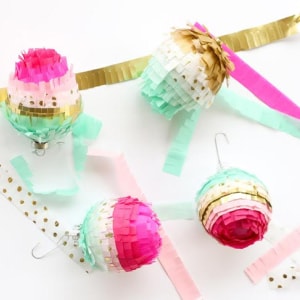
The tissue paper fringe ornament is now ready to be put on the Christmas tree or hung as a home décor item. Repeat the process on other ornaments to have many more cutesy decoration items for your tree or festivities!
In six simple steps, you can make DIY tissue paper fringe ornaments and add them to your Christmas decorations for a touch of novelty!

Did you try out this DIY Christmas ornament idea?
Share your experience with us in the comments below.
Leave a comment
Comment added
Comment updated
Comment deleted
More inspiration

“
“Art enables us to find ourselves and lose ourselves at the same time.”