
Looking for creative ways to decorate your home? This DIY birdhouse might just be the holiday craft idea that you are looking for!
What you will need:
- Ice cream sticks
- Small length, thinly cut wooden pieces
- Barbecue sticks
- Artificial nest
- Cardboard
- Scissors
- Pocket knife
- Camlin Wooden Pencil
- Artificial mini birds
- Camlin White Glue
Here are some simple steps to learn how to make this DIY birdhouse
Step 1
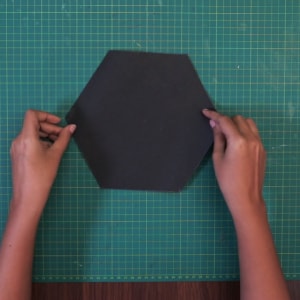
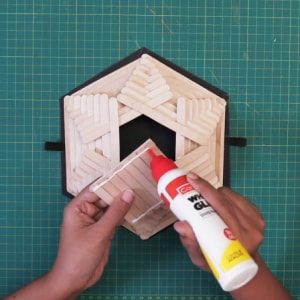
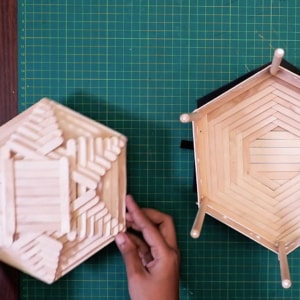
Take a piece of cardboard and draw a hexagon on it. Cut it out carefully using scissors.
Step 2
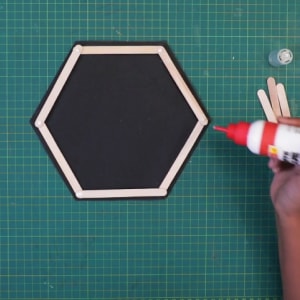
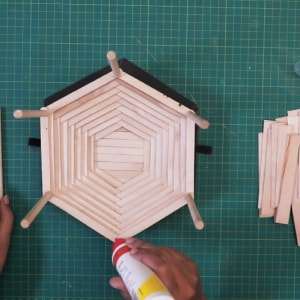
Using glue, stick six ice cream sticks along each side of the hexagon. Apply glue on top of these for the next line of ice cream sticks.
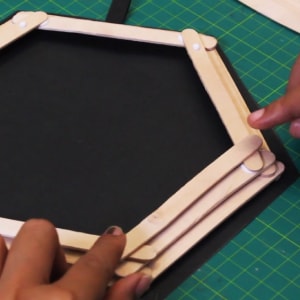
Keep adding glue on top of each layer of sticks and then place the ice cream sticks on top as shown in the image below.
Continue this step until a dome forms as shown in the image below.
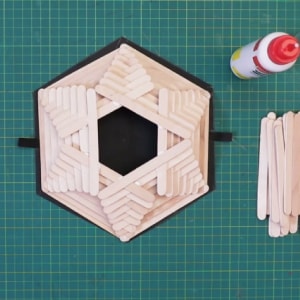
Step 3
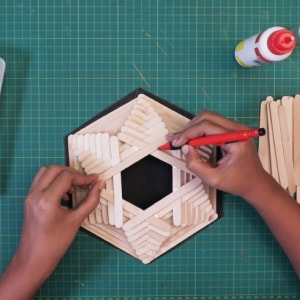
Take a new ice cream stick and measure the distance between the two sides, as shown below. Next, take a pencil and make a visible mark on one of the ice cream sticks to indicate this distance.
These will be used as the base of the roof of the birdhouse.
Step 4
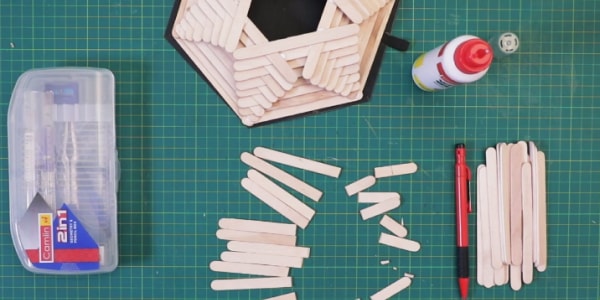
Cut each new piece of the ice cream sticks to the same length as the distance between the two sides.
Step 5
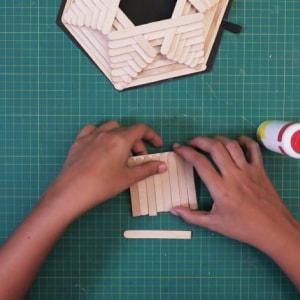
Take two uncut ice cream sticks for each window and apply glue to them. Take the cut pieces of ice cream sticks and glue them onto each of the uncut ice cream sticks.
Stick this on the top of the dome. Repeat all the above steps to make a second dome. One will be used as the bottom and the other will be used as the roof of the birdhouse.
Step 6
Take the barbecue sticks and stick them under the roof, as shown in the image below.
Step 7
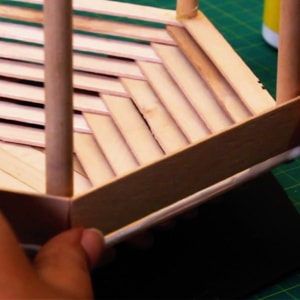
Take some of the thinly cut wooden pieces and stick them around the barbecue sticks.
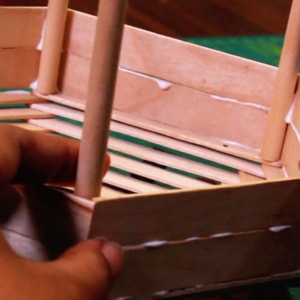
Step 8
Add glue at the tips of the barbecue sticks and place the roof on top.
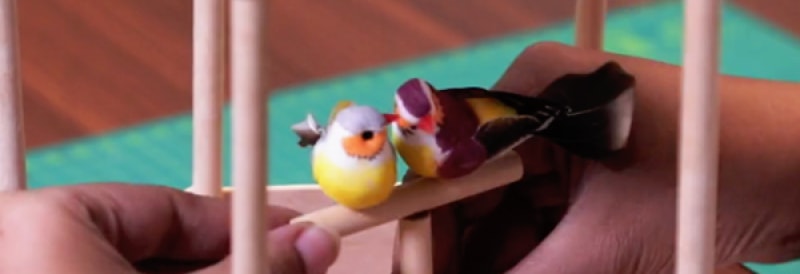
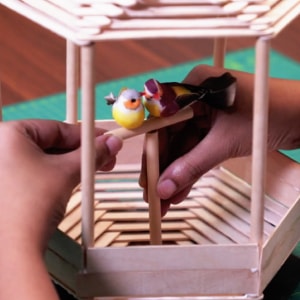
Step 9
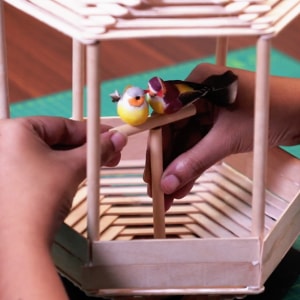
Using two barbecue sticks, create a branch, stick the artificial birds on top and fix a place for them inside the birdhouse with glue.
Step 10
Now simply add the artificial nest to the birdhouse along with some decoration for the birdhouse and you are good to go!
This weekend, give the DIY birdhouse a go with your little one! Apart from being an adorable addition to your little one’s room, it also makes for a great gifting option. Just add a few chocolates and cookies and you’re all set!

Did you try out this DIY birdhouse project?
Share your experience with us in the comments below.
Leave a comment
Comment added
Comment updated
Comment deleted
More inspiration
“
“The artist is not a different kind of person, but every person is a different kind of artist.”