
The interesting thing about drawing or painting nature is that the more you observe your subject, the more you find stunning details that add a certain beauty to your art. The detailed perspective creates a space for intimacy between the observer and his subject or muse, as the artist gradually brings it to life on his canvas.
Don’t worry! Once you break the steps down, the process becomes simple.
What you will need:
- Camlin Brushes
- Camel Canvas
- Camel Water Colour Tubes
- Washi tape/Adhesive tape
- Camlin Wooden Pencils
- Camlin Erasers
- Camlin Permanent Markers
Here are tips on how to draw a butterfly realistically
Step 1

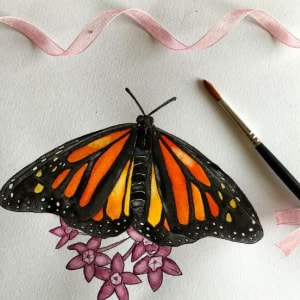
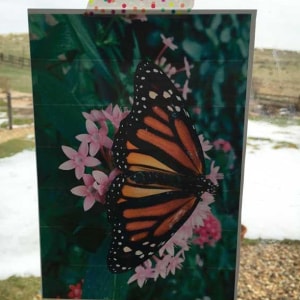
Drawing the butterfly outline is a lot like creating still life! Step one is to find a visual reference. You can have a real butterfly or a picture of one. You can add flowers to the arrangement to make it more lively. Sometimes, drawing from real life can add another dimension to your painting that a flat picture can’t. For this project, we will be using a picture. You should pick a picture that is a close-up.
Step 2
Next, you should pick the kind of paper you will be painting on. Use a paper that can absorb water – whether it is thin paper or a canvas.
Step 3
Grab a pencil that you are comfortable with and start working on the sketch of the butterfly; drawing an outline of the butterfly. If you put too much pressure on the paper, mechanical pencils leave a dent on the paper even after the lines are erased. This may be visible after painting. Hence, use mechanical pencils only if you are already familiar with using them for sketching, without having to need an eraser over and over.
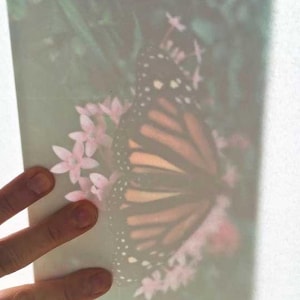
If you are not ready to sketch yet, there is a hack! Print your reference picture and, using a low adhesive tape, affix it across a bright window to use it as a lightbox.
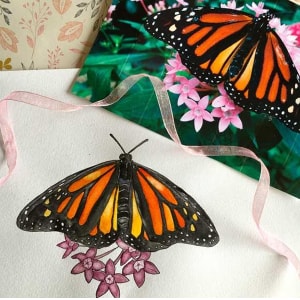
The artist has used a washi tape to affix the image.
Step 4
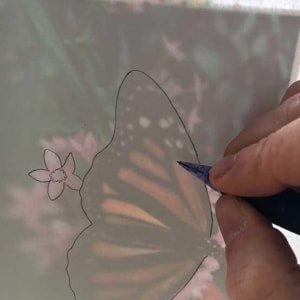
Next up, place your paper over the photo. The window will behave like a lightbox and you can trace the butterfly. This also takes out the possibility of needing to erase constantly.
Step 5
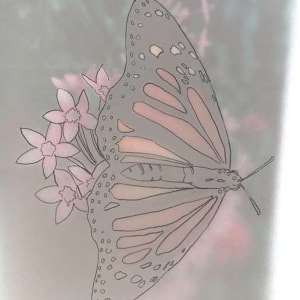
Once you are done tracing the butterfly, you can start focusing on the designs inside the wings of the butterfly. Don’t press the pencil too hard against the paper.
Step 6
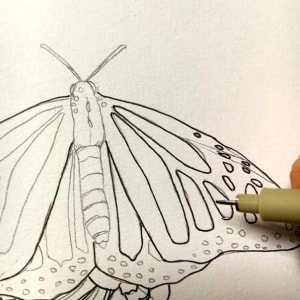
Once you are done drawing the design in detail, trace the butterfly using a permanent marker.
Step 7
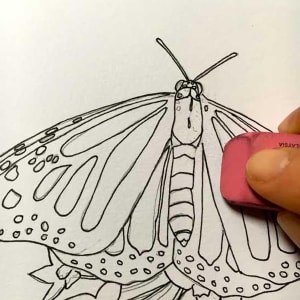
Using an eraser, rub off the pencil marks that may still be visible even after using the marker.
Step 8
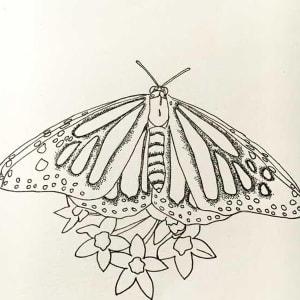
With a permanent marker, use the pointillism technique to give the painting a dimension.
Step 9
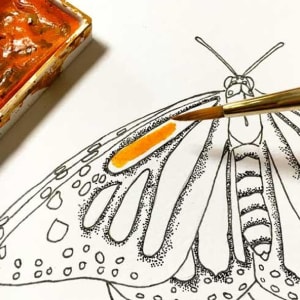
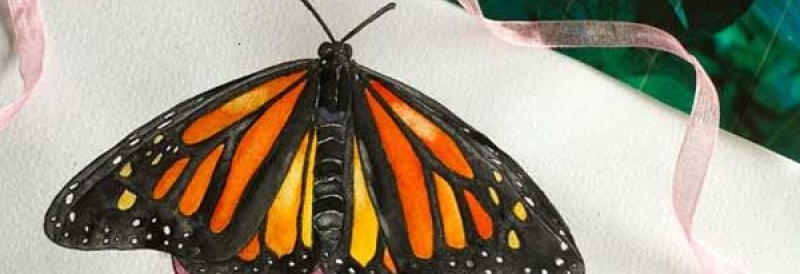
Once you are satisfied with the drawing, begin painting. Always start by painting the lighter shades and then add the darker shades. This ensures that if you accidentally paint the wrong section of the butterfly in a dark colour instead of the light, you don’t paint a light shade over it.
Step 10
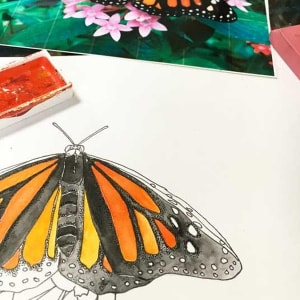
Make sure you step away from your work so that you know that the shades of the colours you are using are right on both sides of the butterfly.
Step 11
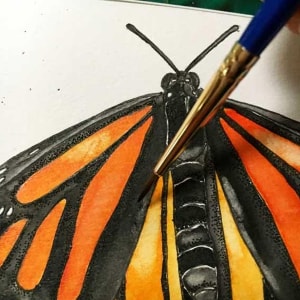
Paint with the darkest shade in the end.
Step 12
Now allow your painting to dry. Once your painting dries, take a step back to admire your work for it is ready!
Butterflies are said to be symbols of rebirth, regeneration and transformation. Hang your painting in your home and enjoy the view! We hope you found these tips for how to draw a butterfly step-by-step simple to follow.
Products you can use


Did you try painting a butterfly with these tips?
Share your experience with us in the comments below.
Leave a comment
Comment added
Comment updated
Comment deleted
More inspiration

“
“The world always seems brighter when you've just made something that wasn't there before.”